Snake V1 Part II: The Snake
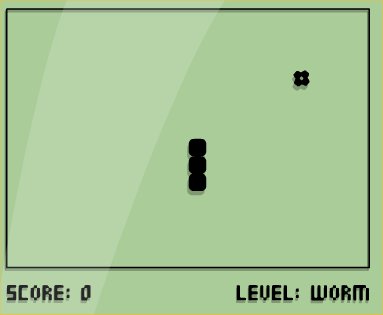
It took me to the ninth post to actually start posting code here. But let’s begin.
HTML
To start, the first thing we need to do is create the base HTML5 that we will use, call the jQuery library and initialize the canvas where we will draw the elements. So we create and index.html with this:
```
!DOCTYPE HTML>
`<html>
`<body>
`
`<!-- Create 500x500 canvas -->
<canvas id="canvas" width="500" height="500"></canvas>

<!-- JQuery -->
<script src="http://code.jquery.com/jquery-2.0.2.min.js" type="text/javascript"></script>

</body>
</html>
```
That’s basically all the HTML we will need for this project. The rest will be JavaScript only. The canvas element while having its dimensions set will be a blank square for now, since we haven’t draw anything inside, so it’s pretty useless right now.
Canvas
So let’s initialize the canvas blank space. Within the <script></script> tags we type this:
$(document).ready(function(){
 // Initialize Canvas
 var canvas = $("#canvas")[0]; // The canvas variable contains our <canvas> element
 var ctx = canvas.getContext("2d"); // We initialize the 2D context of canvas in ctx
 var w = $("#canvas").width(); // We save width and height
 var h = $("#canvas").height();

 // Draw the canvas
 ctx.fillStyle = "white";
 ctx.fillRect(0, 0, w, h);
 ctx.strokeStyle = "black";
 ctx.strokeRect(0, 0, w, h);

});
Line 1 is JQuery initialization, to execute the code when the document is ready to show, thus not having to call it anywhere else. In line 3 we just store the canvas in a variable.
The first interesting thing comes in line 4: the context. The getContext() method returns an object that provides methods and attributes to draw in the canvas. The canvas itself is that: a canvas, and we need to obtain the tools to work on it. As an argument it needs the context we are requiring: in our case is «2d«. Does this mean we have a “3d” context? Not yet, but there is the “webgl” context that let us work with WebGL APIs, and therefore OpenGL-ES 2.0, but that’s for another moment.
The context provide lots of methods, to obtain information about it’s contents as well as to draw inside it. In lines 5 and 6 we store the canvas dimensions so we have easy access, and then in lines 9 and 10 we draw the rectangle that will have the game. With fillStyle we can obtain or define the style (color, gradient or pattern) with which it will be filled and with fillRect we do the fill with the previously defined style. It receives as arguments the top left (x,y) coordinates and the (w,h) dimensions. In the next two lines we make the same but dor strokeStyle and strokeRect, that define the borders of the rectangle.
Defining the Snake
Now we have to create the snake itself. It will be a cells array:
// Create the snake
 var snake_array; // It's a cells array

 create_snake();
And the function to create it
// Fill the snake
 function create_snake()
 {
  var length = 5; // Size of the snake
  snake_array = []; // Initialize the array
  for(var i = length-1; i>=0; i--)
  {
   // This will create a horizontal snake
   // starting at the top left corner
   snake_array.push({x: i, y:0});
  }
 }
The number of cells of the array will be the size of the snake, and we push new elemnts at the end of the array with two properties each: their x and y positions inside the grid. I decided to initialize at the top left, but that’s not necessary.
Drawing the snake
The next step is to start drawing the elements that are part of the game, starting with the snake itself. We call the paint() function to do so:
paint();
And the actual function:
var cw = 10; // The size of the cells will be 10px.

function paint()
{

// Draw the snake
 for(var i = 0; i < snake_array.length; i++)
 {
  var c = snake_array[i];
  ctx.fillStyle = "red";
  ctx.fillRect(c.x*cw, c.y*cw, cw, cw);
  ctx.strokeStyle = "white";
  ctx.strokeRect(c.x*cw, c.y*cw, cw, cw);
 }
}
We store the size of the cells so we can access it if needed, and ot be able to configure it later. In this function we are loop through all the elements of the snake, storing the in c for easy access, and we draw it as we did with the canvas, calling fillStyle, fillRect, strokeStyle and strokeRect, using as parameters the x and y positions of each cell, and multiplying it by the size of the cell, so in each iteration we are drawing a square of 10x10.
Moving
Now we need to move the snake. The setInterval(function, ms) function in JavaScript calls the function we pass it every ms, as per the second parameter. So in this case we will call every 60 miliseconds the paint function. In the future this will allow us to change levels and speed (which we are not going to do in the v1):
game_loop = setInterval(paint, 60);
The movement of the snake will take place inside paint, since it will need to be repainted constantly:
function paint()
{
 // -- Movement of the snake --
 // The logic is simple: remove the tail from the end and bring it to the front
 // Store the position of the head in nx and ny
 var nx = snake_array[0].x;
 var ny = snake_array[0].y;

 nx++; // Increment the value to get the new position of the head

 var tail = snake_array.pop(); // Take out the tail
 tail.x = nx; // Give the tail the position of the head
 snake_array.unshift(tail); // Insert the tail in the first position of the array

 ... code to paint the snake

}
The idea when moving the snake is simple. It has to increase an element in the head and lose one in the tail, so what we do is take the tail to the head. First we obtain the head’s position and increment it, for now on x, to have the position it should have after the movement. Next we pop the tail from the array, so it has one item less than before (the last one), but we store it as tail. The we assign tail the position we previously stored and insert it in the first position of the array, making it the new head.
But why replace the head with the tail in the first place instead of removing the tail and draw a new snake in the new position? Well, basically that’s almost what we do: we remove the tail and draw a new head, but we use the tail element, so we don’t have to create a new object with x and y properties, initialize it and assign it the new position. And also the concept of “moving the tail to the head” makes the snake move as expected, because if we just simply restarted in every frame it will move only to the default direction (since the create_snake function creates a straight array in only one direction). So we don’t restart the snake every time, we just change the position of one of its elements, leaving the rest as they were.
This way we can see the snake moving to the right forever… but leaving a trail. The problem is that we are only drawing a new cell in the position of the head, because our loop does just that: draw, but not “undraw” anything, so we keep adding new cells, but not removing the previous. To solve this we will use a little trick: before we draw the snake, we draw the full canvas again:
Draw blank canvas -> draw snake in new position.
To do this we get the code to draw the canvas inside paint() and execute before anything else:
function paint()
{
// Draw the canvas
 ctx.fillStyle = "white";
 ctx.fillRect(0, 0, w, h);
 ctx.strokeStyle = "black";
 ctx.strokeRect(0, 0, w, h);

 ...all previous code of paint()
}
For now it moves, but always to the right. We have to add directions restrictions. For that we will store the current direction in a new variable:
var d = "right"; // Direction of the movement, by default to right.
And instead of incrementing the head’s position only on x we consider the direction now:
// Modify the values according to direction the snake is facing
 if(d == "right") nx++;
 else if(d == "left") nx--;
 else if(d == "up") ny--;
 else if(d == "down") ny++;
And the head’s new position:
tail.x = nx; tail.y = ny; // The head's position is assigned to the tail
Keyboard Inputs
Now the snake can move in every direction… by itself. We need to get the keyboard inputs to be able to interact with it:
// Add the keyboard controls
// including a clause that prevents it from going bakcwards
 $(document).keydown(function(e){
var key = e.which;
if(key == "37" && d != "right") d = "left";
else if(key == "38" && d != "down") d = "up";
else if(key == "39" && d != "left") d = "right";
else if(key == "40" && d != "up") d = "down";
 })
It’s simple: we get the input from the keyboard and depending on which key was pressed we assign the direction to the corresponding variable. We check if we are going backwards so it can’t make any weird movements like going to the left while the direction is right.
For now we will keep it here. We have a canvas with a snake that moves as we command it, always inside the plane because otherwise it will dissappear. In the next part we will add the food, the endgame conditions and basic scores.
Index
With this we’re almost done. Next time we will make the fun part, with the eating and points elements of the gameplay. Enjoy!
- Introduction
- The Snake
- The Game